I'm gonna just copy and paste this from my existing build thread from clubroadster. Also, this is more of a "here is how I did it and I am generally happy with the results" than a definitive guide to autobody. I think it is important for drift car builders to be able to do some body work to keep the car looking good. Its a valuable skill and lots of fun once you get the hang of it. I have since painted some other aero and plan on painting another friend's car next summer.
Good evening d-club, I’m gonna try to put together my sparknotes regarding painting a car from the perspective of someone who has never touched a paint gun before. This is not a full tutorial or how-to but rather answers to stupid questions I had and stupid mistakes I made. I am sorry in advance for lack of pictures. I am really stupid so don’t take anything said here as true, this is just my personal experience.
First off I should probably talk about the equipment used in the process of painting the car. Here is a spreadsheet that I put together to estimate the cost of this paintjob. There are things I purchased but did not need, these were excluded from the list. I also did not include the basic mechanics tools used to lift and disassemble the car. I used a $330 26 gallon compressor that could maintain 6.2 CFM, it seemed to keep up with the harbor freight spray gun just fine. Loud tho.

With equipment out of the way, make sure the car is in a central part of the garage with plenty of space around it for painting, it won’t be moving anytime soon. The first step of this process is to wash the car thoroughly. Dish soap and a garden-spec pressure sprayer make this easy in your garage. Next, you’re going to begin disassembly. Take off taillights, washer nozzles, side markers, anything that you could hit and damage with the palm sander. For the love of god take off the door moldings under the windows. They’re probably crusty and need to replaced anyways and its so easy and makes the car look infinitely better. Don’t remove body panels at this point as it is much easier to prep them mounted on a car.
With a clean partially disassembled car, you can begin sanding the body. Wear a respirator while sanding! How damaged your paint is will determine the extent of sanding that needs to be done. All of the clear coat had failed on my car, with some other peeling/etc on my trunk. ALL FAILED PAINT NEEDS TO BE REMOVED. Painting over failed paint is a stupid idea so don’t even try. If your paint is in okay shape you can start with 320 grit and take off as much as you feel comfortable with. If your paint is completely shot like mine was, start with 180 grit to remove failed paint with the palm sander. Work your way up to 400 grit with the palm sander. Try to go panel-by-panel, I jumped around and I feel it slowed me down. I recommend using a foam interface pad between the sander and the sandpaper. Do not tilt the sander on edge while sanding to make it eat paint faster, keep it level to the surface. Replace the sanding disks more frequently than you expect to.

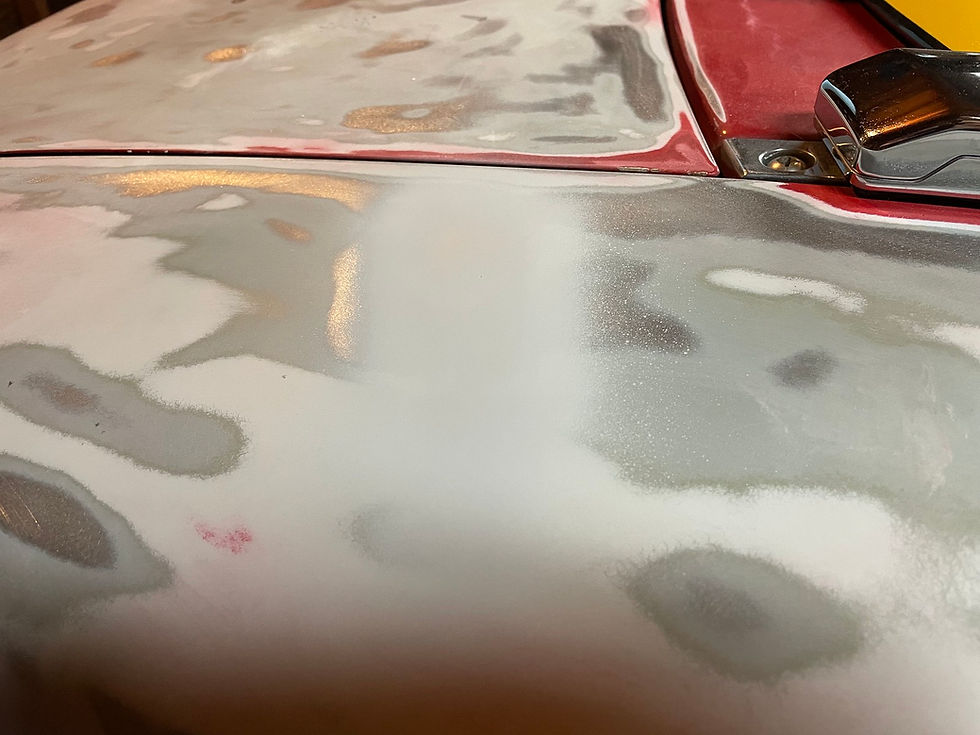
Damaged paint


DO NOT sand down to bare plastic if you don’t have to, as this will make the plastic “fuzzy”. I had to remove a lot of totally failed paint from my rear bumper which resulted in some fuzzy areas of bare plastic. To remedy this, I wetsanded the bare plastic with 800 grit, and moved up to 1500 grit.

For jambs, I used green scotch brite pads making sure I scuffed every surface. If you have aero or auxiliary parts, hit them with 400 grit to scuff them up nice before primer. Hit crevices with pads to scuff every square inch. This process creates a lot of dust. Dust is bad and needs to be evacuated from the car and garage. This was best achieved by spraying crevices with compressed air, and then using a leaf blower to blow out the rafters/shelves/floor of the garage. Safety goggles and respirator are your friends here unless you want to die.

Now that the car has been machine sanded, you can move onto filling low spots. I also opted to shave my antenna hole in the process. I JB-welded a piece of metal underneath the hole then filled it with body filler. This might not have been the best course of action, as there is a small white ring barely visible where the hole used to be. Not sure why as the JB Weld had over a month between application and paint, plenty of time to cure.


Anyways, I did not use a guide coat to find low spots. I used my block sander and ran my hand across each panel to feel for any major low spots. This method is not perfect by any means but I probably got 90% of the low points which is within scope for this project. Clean the low spot really well with degreaser (I used brakleen tbh) and then mix/apply filler. Something I didn’t expect was that the working time for body filler is only a couple minutes after mixing with hardener. I struggled with this initially but there are plenty of techniques online for how to lay filler on the car.

For high spots in the metal (like by the battery where it dented the quarter panel from the inside) simply tap the metal down very lightly with a hammer and lay filler over the now low spots. Once the filler is laid on the dents, you can use your sanding block to level it to the body. Big block for expansive and flat areas, small block for curvier areas where big block doesn’t fit. I recommend overfilling dents if this is your first time, its easier to take down with block sanding than it is to reapply the stuff. Be careful to apply even pressure on the block to make sure the low spot doesn’t become a flat spot. Block the entire car with 400 grit, check for newfound low spots, block again, repeat until you’re satisfied. Filler primer is a thing I found handy during this process as well.
Once the car is completely blocked, its time to wash it again. Blow all the big dust out again. Wash wash wash, clean clean clean. You cannot overclean the car. With the car cleaned, it can be further disassembled. Bumpers, door jamb bits, hardtop, headlight lids, finish panel, Frankenstein plates, door seals, door handles, etc. The worst part of painting this car was dealing with the hardtop IMO. I would recommend leaving it as long as possible as it keeps water/dust from getting in the car. With the car more disassembled, you will now have access to clean and scuff the hard-to-reach parts. The order of operations is sort of up to you, but I sanded the windshield frame by hand, the rest of the door jamb parts I couldn’t reach before. This is a good time to take a break and step back from the car to see the big picture and make sure you aren’t missing anything glaringly obvious; it is easy to hyperfocus on a single area of the car. Walk around the car, run your hand along every inch of the car, look at corners of panels that might have been neglected in the sanding process. With everything confirmed scuffed, blow off the dust and wash the car again.
When the car is clean and dry, you can begin the masking process. It will take time, I should have used better tape when I did this. The first thing I masked off was the windshield. Run some nylon rope underneath the outside of the front seal. This should lift it off of the frame and allow you to run tape to the edge of the seal, and when you spray it will be cleaner. Using the 3M car-specific plastic sheeting, lay it over the windshield with “Paint this side” up, tape it down. I used one continuous piece from the top of the windshield to the front of the engine bay under the hood. Use tape to keep loose plastic from blowing onto the wet paint when you’re spraying. When masking the cabin, I ran a couple pieces of sheeting from the top of the windshield frame to the back trim piece. I peeled off the jamb trim pieces and taped the plastic down where the trim goes.


When masking, I found it better to leave a little (TINY) bit of the trim/seals exposed rather than cover to the absolute edge. Most of the time no paint actually landed on the tiny bit of exposed seals, and if it did it was super easy to clean off after the fact. If you go right to the edge you risk masking off the metal and paint cant touch what is covered. There is a finesse to this but it is not difficult. I peeled the door seal from the top corner all the way up to the front of the triangle window, then I cut a very small slit in the cabin masking plastic and ran it though on top of the dash, and wrapped the few exposed inches in masking tape. Not perfect, but worked out better than I expected. All exposed and threaded holes got a little roll of tape stuffed in them so the threads wouldn’t get gummy. Hubs received a plastic grocery bag each, didn’t even tape them on. Again, take a step back and look at the car. Is there anything you don’t want painted uncovered? Is there anything you want painted uncovered? Disassembling and masking the hardtop sucks, I was able to better manipulate the top by placing the back edge on vehicle dollies to move around and laying it on a blanket upside-down in some thick grass. Take your time around the trim on this, the seals are easy enough to remove that there is no reason to not remove them. Don’t forget to mask the headliner/window on the inside otherwise you will get a ton of overspray inside.

Once masked, carefully wash the car super good again. Avoid getting water near the tape. Every time you clean the car and the surrounding area, your paintjob gets better. Your spraying setup should look something like: compressor > large dryer > hose > small filter > regulator > gun. Try to make the setup before the gun as compact as possible, when youre spraying the rockers you want to make sure the gun can go low enough to get under the car. I had to max out my jack stands for barely-sufficient space. Test clearance before spraying anything by doing a “dry run” making sure that there is enough space for you/the gun/the hose to move and access every part of the car that needs paint. Also, lighting is so important and should be prioritized. Mine was inadequate and the parts of the car that weren’t well-lit definitely turned out worse than the rest of the car. I covered the walls of my garage by stapling plastic sheeting. Not sure how much good this did overall but I don’t regret it. I also cleaned my garage like crazy, doing my best to remove dirt and debris that could be kicked up. I set up two fans for intake and one for exhaust, using cardboard to cover the holes at my garage door and household filters taped to the fans as to not introduce debris into the paint zone.
Car is disassembled, bodywork is done, car is masked, air is set up, garage is as clean as you can make it. Now is the time for the terribly messy ordeal of putting a liquid on a solid body. First thing you want to do is set up the gun’s spray pattern to a tight eclipse shape. Use water to set up the gun. There are a million youtube videos explaining this process, but the one bit of advice I have is to only use the recommended PSI as a guideline. The regulator at the gun read about 20 psi when I got the pattern as good as I could, which was about 10psi lower than the suggested rating. This reading is taken with the trigger of the gun pulled. The regulator at the compressor will probably have to be set at about 75psi to have ~30psi at the gun. Here is the only picture I have of the gun setup, note how long it is with the regulator and filter:

You will probably want to prime the car, especially if it is multicolored. Base coat is partly transparent and an uneven finish will show through it. The paint I used was PPG’s lowest tier “Omni” and all of the technical data sheets can be found online. You need to become very familiar with these data sheets and treat them with respect. Mix the primer of your choice according to the data sheet. Make enough material to fill the gun entirely (20oz) and then a little more left in the mixing cup. You don’t want to run out of paint halfway through spraying a coat, but it’s not a big deal if you need to pause to mix a little more. What you DON’T want to do is let the gun run out entirely where you start spraying air and it sputters. You will have a nasty finish at that spot. Simply keep an eye on the level in the gun, if it gets low don’t panic and fill it up. As far as technique goes, you can watch a billion tutorials and you’re not going to have good grasp of what to do until you get some practice in and muscle memory built. You NEED to practice on scrap panels if you have them. If there are runs, you’re spraying to much material on, try increasing pressure or moving a bit faster with the gun. If the finish is rough, try to do the opposite. Each pass should have about 80% overlap with the previous, keeping the gun parallel to the panel you’re spraying. Spray ALL the way to the edge and a bit past, but don’t spray paint into the air, that’s just expensive waste and a mess. Primer is very forgiving, but you still don’t want to put it on too wet. I happened to put way too much on the corner of the windshield frame and it was not drying properly. I took 800 grit paper and used it dry to slowly take down the spot of excess. Since it wasn’t dry, the paint would kind of pill up and roll off. I took my time and was able to eventually knock it down to a reasonable level. I put two coats of primer on before moving to base.

I treated base the same as primer, and happened to get a couple small runs in the base. It is CRUCIAL that runs in the base are taken care of before clear goes on, because there is no repairing them once that happens. I again used 800 grit, lightly sanded until I took off the paint, then spritzed the area with some more paint. The key is not panicking and taking your time here. I put two coats of base on the car before moving to clear, in hindsight I should have gone for 3 coats for more thorough coverage since I had plenty of paint left.

I shot clear coat in the same gun as I did primer and base, cleaning the gun out between each stage with lacquer thinner. Clear you want to spray an initial lighter coat, let it get tacky (not stringy) so the second, wetter coat “sticks” to the first coat. This will reduce your chance of runs. I still got plenty of runs in my finish, but this was quite literally my first time using a spray gun. I put two coats of clear on the car. Clear also hangs in the air for a LONG time and the better your ventilation is, the quicker it will dissipate.

Again, there are a million resources on the internet to study professionals’ techniques, so I am not going to go into specifics about that here. Wear PPE or die, including a paint suit/respirator/gloves/goggles. I used ladles to move paint from the gallon cans to the mixing cups, and tossed the mixing cups once I completed that stage of painting. Cleaning them is just too messy. I wet the floors with the garden sprayer before each coat, this keeps bugs and dust to a minimum. With each stage (prime/base/clear) I started with the door jambs then continued the paint around the windshield frame into the other jamb. I let it sit and tack up a bit so I could lightly close the door and not worry about paint transfer too much. Is this the correct way of doing stuff? Idk but that’s what I did. In between each coat of primer and base, you are going to want to use a tack cloth and tack the entire car down. DO NOT tack between coats of clear, you will hate yourself. I forgot to re-tack after my second coat of base and regret it, the little pilly bits of paint from taking care of the runs ended up on the hood and under the clear. Lesson learned. Also make sure your hose does not ever come in contact with the car while spraying.
Once the car was done being sprayed, I tore a hole in the cabin masking and windshield so I could drive it out of the garage, making sure not to disturb the tape until the paint cured more. I moved all of my prepped aero inside of the garage and set it up as pictured.

I tried to keep the majority of surfaces horizontal to avoid runs. I repeated the same thing that I did with the car. Except this time I did not use intake fans and only used an unfiltered exhaust fan. I could not tell a difference in levels of dirt in the paint, if anything the aero turned out better than the car. If I could redo it I would have set up all 3 fans as an exhaust and used my small window as a filtered intake. In theory positive pressure in the painting area is preferred, but in practice I think having all fans used for exhaust is more beneficial. Just my opinion.

Once the paint is all cured, remove your tape and plastic and bingo bango you just painted a car. Reassemble and crooze. Don’t be lazy and be sure to clean every part during reassembly. I'll edit this if I feel like it later.

Nice, thourough writeup and great job for your first paint job! That's my favorite miata color. My first paint job was a blue roadster too!