Owning one of these cars has been in my head since I was a kid and getting to finally own a blank slate and build one to my taste inspired by many of my favorite drifters has been a special & rewarding experience. Hope this car shows its not too late to get into one of these in modern times with the scarcity and value that has come to be associated with this platform if it something you are passionate about. Thanks for reading through this if you do!
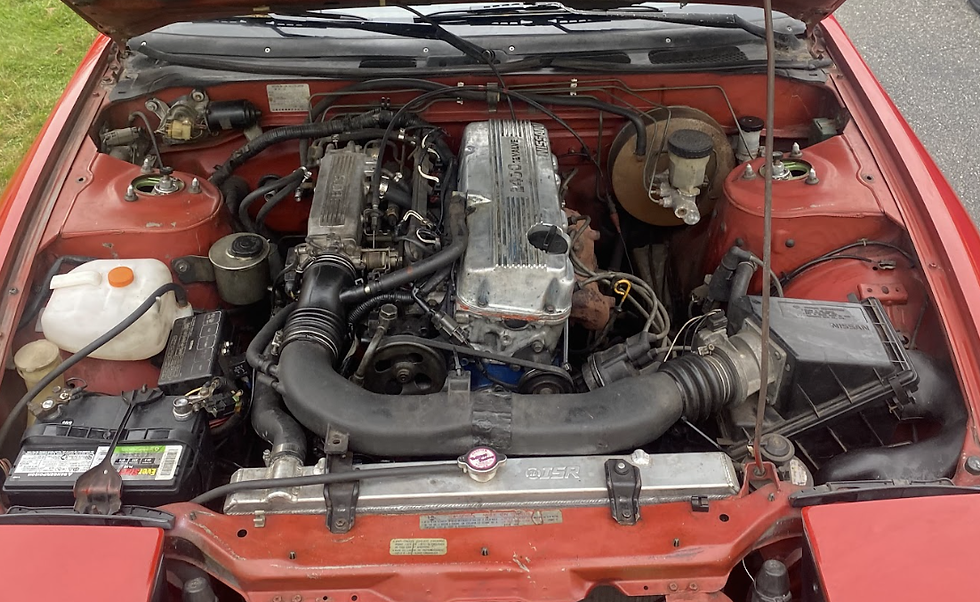
Mid February 2023, on impulse I parted out & sold my daily-driver Lexus gs300 within 5 days. I flew down to Charlotte NC to buy this 323,000 mile, rust free, mostly original 5 speed KA24E Nissan 240SX hatch. Drove the car 1300 miles back home to Boston myself with no major issue all in one weekend and I truly couldn’t believe I owned one, still don’t really. The car was certainly a little rough paint & body wise but it checked off enough of my criteria and I felt happy with the purchase price of $5000 cash. This was trailing off the comedown of covid-prices where I thought the days of a sub 10,000 decent s-chassis were behind me. I noticed the market starting to fall and jumped at my opportunity to pick up this perfect base to own & build.

The first modification was a set of Feal 441 drift spec coilovers. I kept spring rates pretty soft at 8K F/ 5K R and have been really happy with the ride height and quality since.
Next step was replacing the cracked flocked dash with a really clean uncracked one. A friend of my dad's had this dashboard sitting in storage since the late 90's and it was in immaculate condition. Also used this time to swap in an original 360mm Nardi classic steering wheel mounted to a works bell short hub I found very cheap new on auctions. The horn wiring was the easiest i've ever done
The original plan was to keep the car 4 lug with 90's inspired aero and small wheels. Acquired a full set of 16x7 +30, 16x8 +35 Yokohama AVS VS6 along with a pair 15x7.5 +13 ssr reverse mesh and 15x7 +7 hoshino impul G4’s. Aero consisted of a cheap fiberglass pignose lip I destroyed in one day, chuki style skirts, Silvia spats, and an unknown wangan style spoiler from auctions I had to fiberglass back together after a DHL mishap. Car was starting to look a bit more interesting at this point and I had only owned it a few weeks.

To keep the wheels locked I sourced a Cusco LSD not knowing much about it other than it was titled "Burr Effect". A replacement gktech expansion tank, and OEM battery tie down were installed to tidy up some issues while I daily drove the car in between snowstorms in early march. Ensuring the 240 was track for ready Lock City Drift season opener event within a month of ownership as my main drift car was on jackstands. I primed the hood black and threw the 15’s on as tires came in for them. Loved how meaty a 60 sidewall looked on the back with the reverse lipped meshies personally. I mounted all the aero, as well as Do Luck Type II style front bumper.
The interior was decked out with a bride zeta 1 + ergo 1 on bride rails. I was ready for the first track day in my silly small wheel machine. Hit some snow coming back from alignment, which was pretty sketchy on 100tw Zestinos up front. I ended up needed new front LCA as ball joints were shot. Poly rack bushings, new outer tie rods, and a trans mount bushing freshened up the 34 year old Nissan.


Both the car and I struggled a lot in terms of steering feel on track, yet I still had a ton of fun. Definitely opened up my eyes to how much restoration work this tired car needed to feel better when pushed. Taking too shallow a line caused me to go off and damaged the fiberglass do luck bumper on track so I rocked the oem pignose front lip. Daily drove the car for the remainder of march/April like this.
My turbo Miata was up and running in April so I could spend some time doing body work on the 240. Started sanding the 240 down as is and that’s when the direction of the car kinda shifted…
Made the trek out to New York with a friend to pick up a full BN sports type 2 body kit used. Into the crazy aggressive styling of BN kits specifically and I jumped at the oppurtunity to own an authentic one. I would have to change quite a lot to match the styling of the new kit however. First step was a set of new factory jdm kouki type x tailights and finish panel. I’ve had a factory type x wing since early 2020 as it fit the Miata well and has been sitting. Definitely modernizes the look of the car and fits the whole kouki look. Swapped out the Bride Zeta I for a more period matching Artis II around this time also.


Early mock up of the kit, it had holes drilled in the side for rivnuts in addition to some cracks that needed repair. I got my hands on a set of kabuki ganador replica aero mirrors for the car too and was blown away by the quality. Have had authentic ganadors in the past and these feel much better and fitment is the same. I’m typically pretty against running replica parts but I’ll make a few exceptions and this is a logical one. I ended up getting the power harnesses wired up and have yet to experience any issues. Even for a relatively straight car, prep and bodywork ended up taking me close to a month chipping away at it. Tucked the front fender harnesses and rolled all fenders during this phase of the build also.


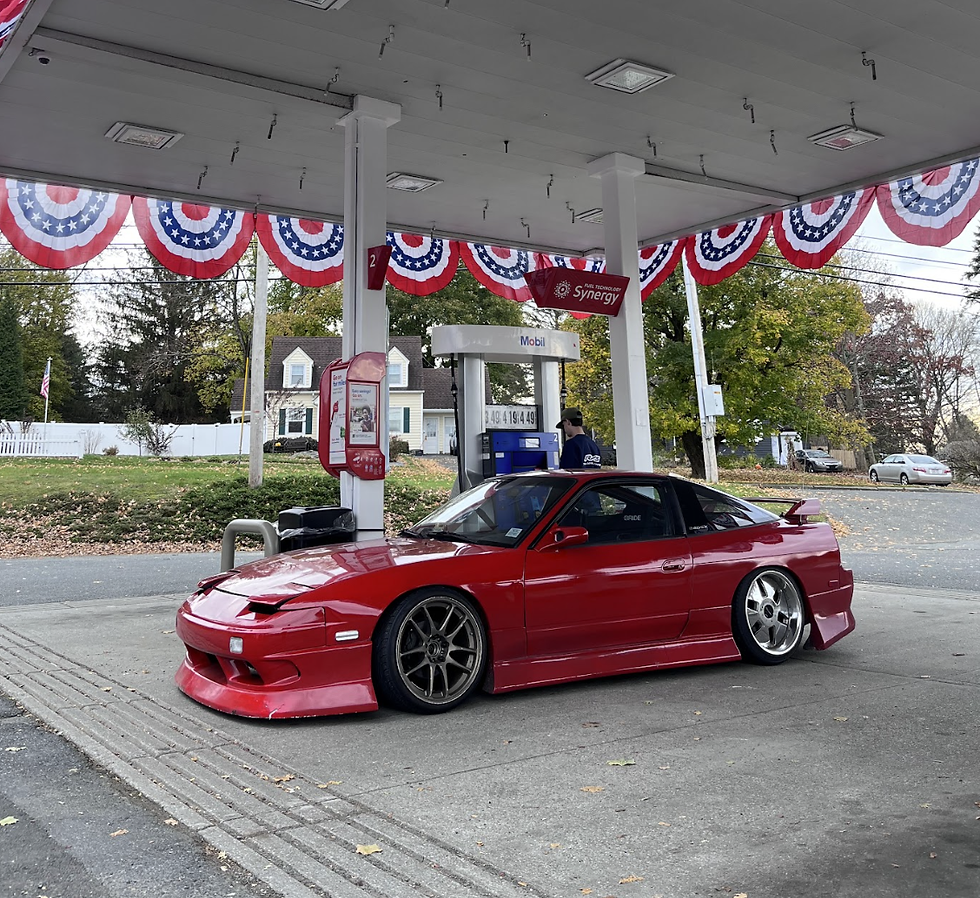
Dropped the car off for paint ready to spray and 2 weeks later it had a fresh coat of Nissan 526 Hot Red on it. Around this time I pieced together a 17/18 double staggered OG Bronze Work CR Kai set, as well as 5 lug hubs and z32 front brakes. It was crucial to get the car rolling on bigger wheels to fill the larger wheel wells of the BN Sports kit. Started putting all the aero and light pieces together and got the front and rear 5 lug swap done. Installed some Megan tension arms, rear camber arms, tanoshi rear toe arms, and fresh tie rods to get the car mechanically solid. Brand new Blue tint Raybrig headlights, clear front fender markers, and 180sx dual position front marker lights updated and freshened up the look of all the lights on the car. I resprayed the headlight bezels in trim black paint to keep them looking new also.


I was pretty unhappy with the front fitment up until this point. This was resolved by a set of T3 43mm extended front LCA + Maxima inner and outer tie rods to extend the front track width and give me more negative camber. I am going to continue running with a stock knuckle as I dont feel the need for more angle at this time. Doing so also lowered the front ride height dramatically. This looked quite nice, however left my front bumper on the ground and I exploded it on just the test drive around my block. A slight raise in height has helped since. I repaired and resprayed the bumper just in time to make Japanese Car Show at Larz Anderson in October which is always a pleasure to attend.

Early November, the car made the 3 hour trip out to Lebanon Valley Speedway for a local drift event with friends. Mounted up fresh acceleras on a recently aqquired pair of 18x9.5 +30 Work Euroline wheels. I continued to struggle with the lower power of the KA24E, but I was able to get a little more comfortable throwing the car around before my PS pump started leaking bad. I pulled the belt to avoid chance of fire and was able to get the car home safe and sound. Was my first time at this venue and really enjoyed it despite smacking the front bumper every 10 seconds.

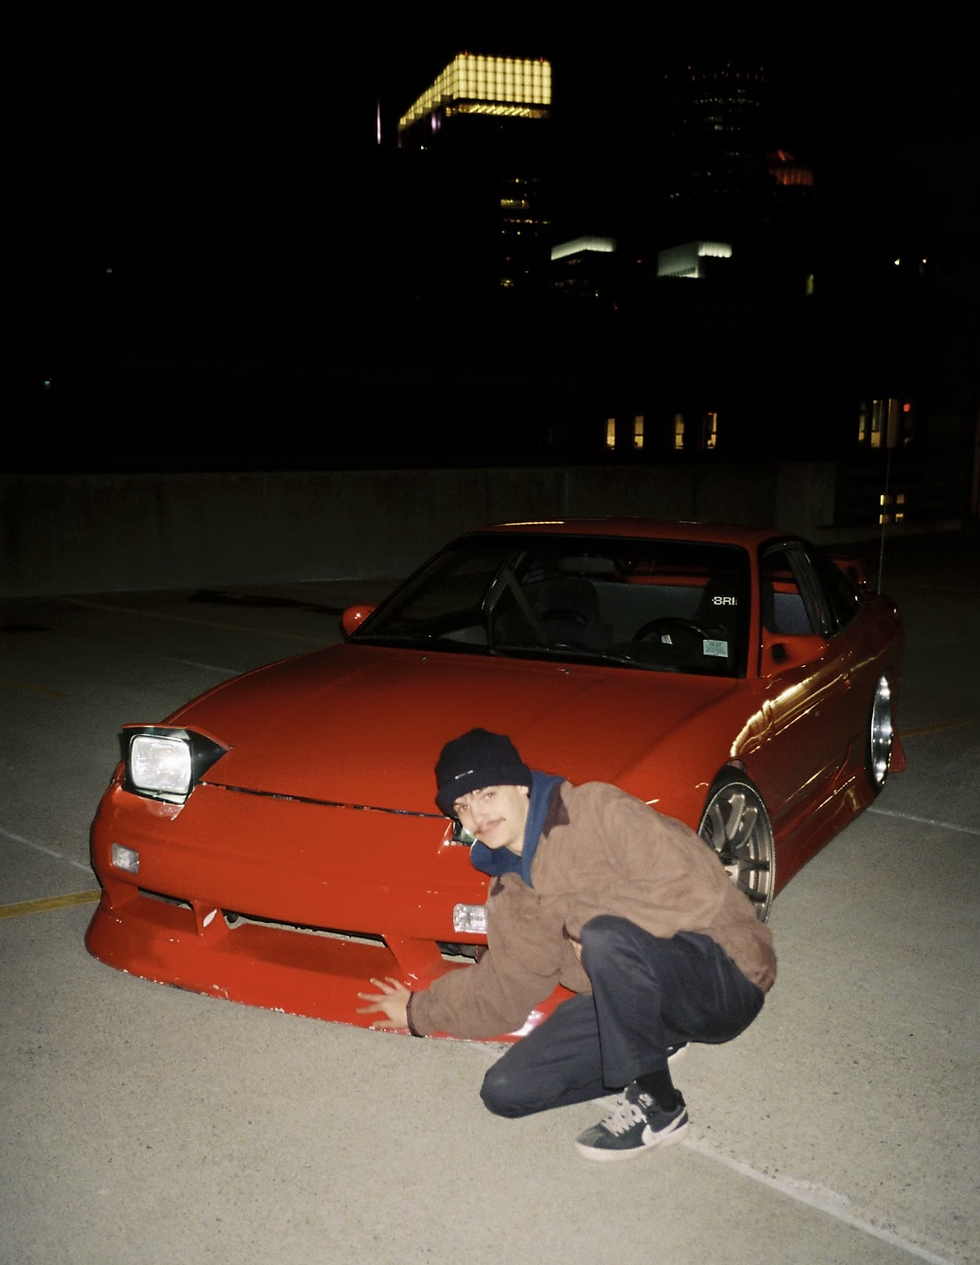
Last drive of the year out in Boston shooting the car with friends. I picked up a full S14 SR20DET swap shortly after for a very fair price right as I put the car in storage for the winter. Downside to living in New England winters is the road salt renders it safest to keep rust free vehicles off the road to ensure minimal corrosion.


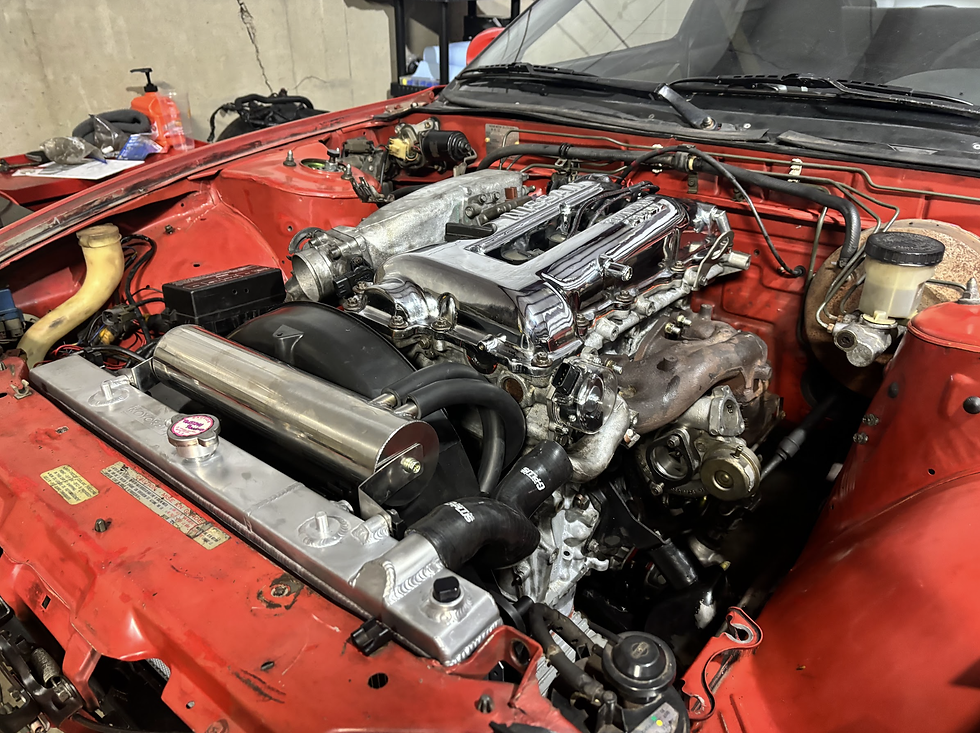
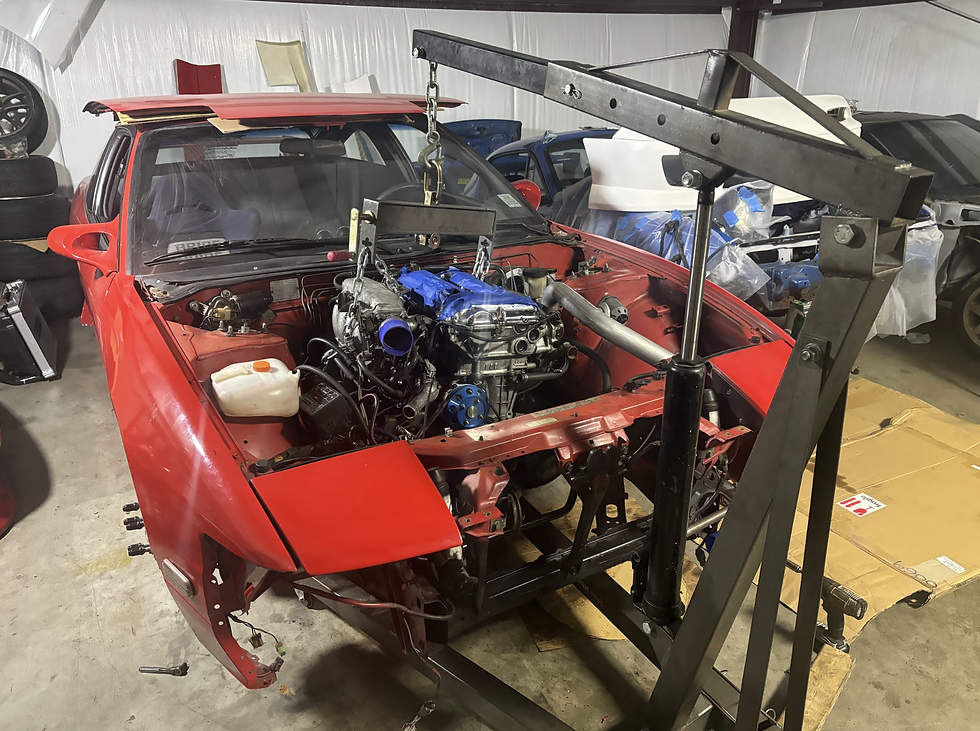
Thus began the process of SR-swapping the car. I removed the factory KA24E single cam drivetrain and got the new to me SR on an engine stand for inspection. The plan was to keep the engine unopened and in "normal" spec with factory internals and retain the S14 T28 turbo. I ordered some basic maintenance items such as new silicon coolant lines, water pump, and all oem gaskets that could be changed easily. The engine was missing a significant amount of hardware so that was addressed with new hardware where needed. Greddy large capacity oil pan was installed to try and prevent oil starvation from the sketchy OEM pans that can bend and block oil from actually reaching the sump. I dressed up the engine with some under/overdrive pulleys from Greddy, and a chrome plated valve cover from GETJPN.


A new steering rack, and motor mounts were installed with the engine out for ease of maintenance. I also took this time to degrease ad detail the original engine bay paint as best I could. Test fit the new SR20 specific Koyorad radiator, clutch fan shroud, and GKTech over the shroud catch can. DEFI Triple meters mounted on dash to help monitor the SR20 vitals, I still need to wire them up at the time of writing this.


18" Yokohama AVS Model 5 Test fit! Thread is caught up to current date, I have been slowly chipping away at the SR20DET swap. ACT clutch is ready to go on and then the engine can be dropped in. After this I plan to drop the rear subframe to install my poly bushings as well as Project Mu Rear brake pads
~January 2024 when I got the first complete SR drivetrain into the car. I reused the factory flywheel & ACT pressure plate that came with my swap that came with car after buying a replacement disk from ACT. I am pretty sure I forgot the dust shield and had to pull it back apart and redo it but that's a classic mixup.
With the S14 SR20 powertrain in the car I began collecting & getting parts to get the swap running smoothly. I purchased an Apexi Power FC D-Jetro ECU, BLITZ FMIC kit, wired up my DEFI meters, and other finishing bits. My model 5's were sanded down, primed & painted metallic silver to refresh their prior defeated surface scratches.
Waiting on a custom wiring specialties engine harness was the biggest downtime, after about 6 weeks I received & installed my harness in march 2024 and the car was able to idle for the first time! I got the car going on the Apexi Power FC base map before about 10-20 seconds at a time however the car would eventually shut off as if it was hitting a hard stop on something internally. Eventually, the engine seized and what I found when I pulled it apart I would've never expected....
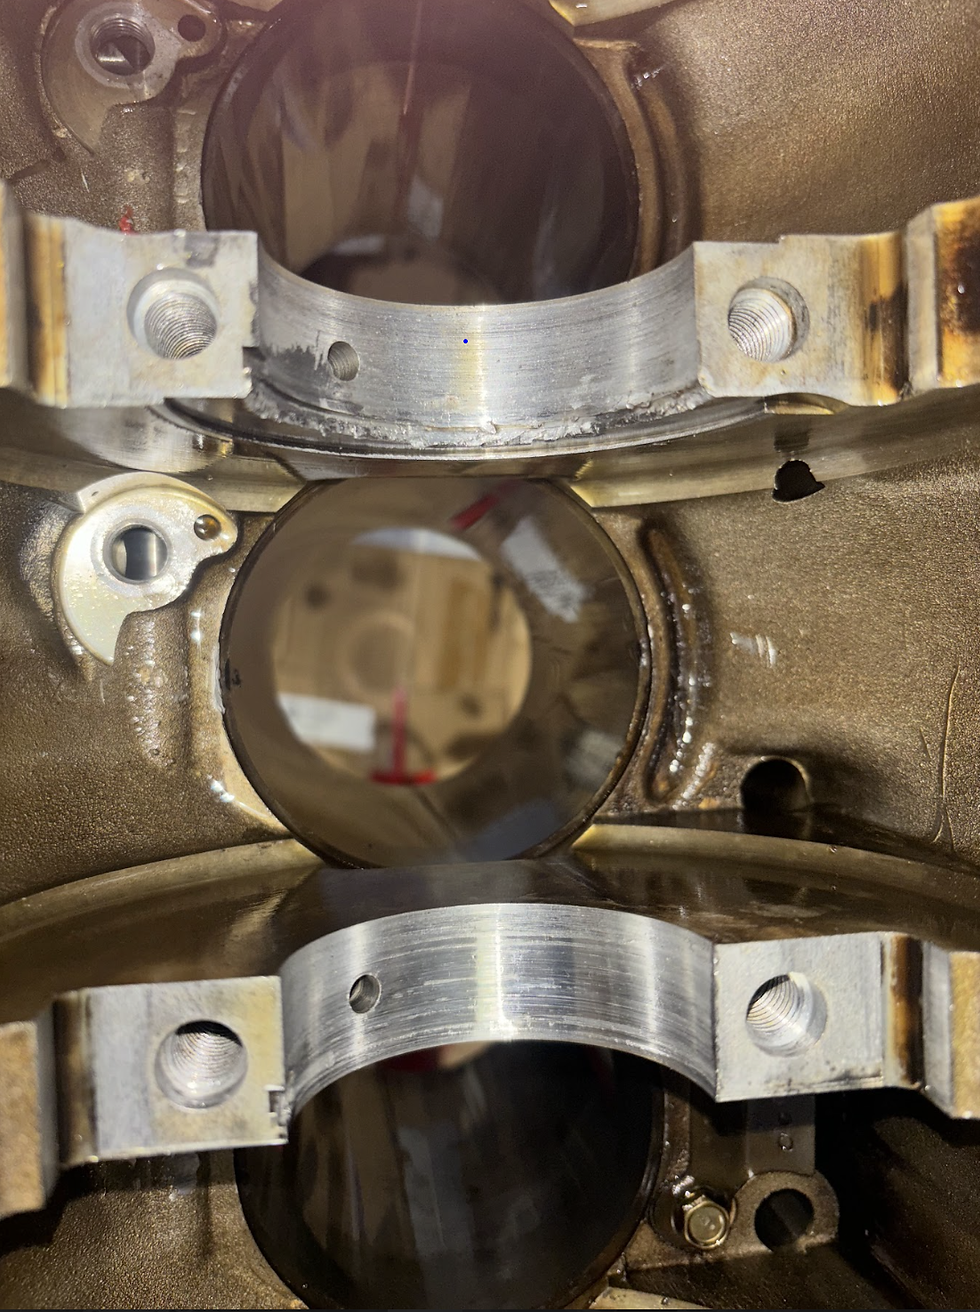
Pulling apart the lower oil pan it became obvious the engine was missing the majority of its rod bearings and main caps! There were signs that the previous owner had taken the main bearings out, observed some sort of bearing failure, then half-assed reassembled the engine to sell it off to an idiot like myself... The engine had passed leakdown & compression as well as turned over and felt like a healthy engine should until it didnt. I had only paid $2800 for the entire swap, so after completely tearing it down and parting it out, I had made back at least half of my investment, got to keep a ton of parts including turbo, CAS, trans, charge piping, & clutch for later use. I had taken the seller in good faith, and it did not end up working out in my favor. I was determined not to let this stop all progress and I continued on my hunt.
The original rear subframe was dropped for inspection, and replacement bushings. I originally went with some poly GKTech replacement subframe bushings, but last minute switched up and went with PBM solid subframe risers to hopefully correct the rear geometry and aid the car in driving better at the height I plan to run it at. In addition to the subframe risers, Megan poly sway bar end links replaced my worn out original units & I took the chance to replace a blown out axle I had found as well. While maybe premature, I decided to purchase a cut knuckle for this car as I am used to the driving style on a similar knuckle design.
April 2024 with spring fast approaching, I found a S13 SR20DET swap that was in line with what I was looking for, and that Saturday I gathered my 2010 lowered Honda Fit, US passport, and all the willpower inside my heart and made the 10 hour round trip up to Montreal & back to secure. After a slight hold at customs, I made it back to unload the complete swap out of my fit, I got right to work swapping out the blown s15 turbo & ISR manifold for my healthy S14 turbo & oem cast manifold. The silicon hoses under the intake were swapped out with silicon ones to hopefully prevent the original ones battle with father time when I do not want to deal with it on the side of the road. I was able to run a cool one-off painted valve cover I won in a raffle from good-ride garage the day after I picked up my S14 SR.
A works9 eardrum rupturer cat-back exhaust I won and imported off of YAJ was mated up to a generic auctions test pipe, then a PBM cobra downpipe under the car to the turbo. Hoping for a very loud and deep tone once I get it going, which this SR20 unfortunately did not. First compression test failed completely, I pulled the cover to find I had dropped 75% of my intake rockers with cracked guides. With some guidance, I found that the guide & shim had been swapped incorrectly by the previous assembly of the engine, and the incorrect tolerance caused the rockers to press into the shims too much, cracking them, and dropping the rockers. I fished out the shrapnel, ordered new oem guides, and reassembled + timed the engine back together with fingers crossed. This next compression test boded 150-120-120-60 across and at this point I decided I needed a break from working on it. I had burnt myself out and car sat on jackstands in this state for about 4 months.
Fast forward to August 2024, I leak down tested my head, found some issues and pulled the head to go to local machine shop for diag and repair. Which I recieved back around December 2024 with a fresh valvetrain and set of BC 256 Cams. Mazworx-ARP headstuds, new OEM headgasket mated the new cylinder head to the bottom end, and I had issues with timing the engine that led to me replacing the timing chain. I had found some of the chain teeth links to be bent and contorted, and a new oem chain was fairly reasonably priced. The steps required to replace this chain however dropping both the upper and lower oil pans as well as front cover to access which can be quite a pain in car, but doable.


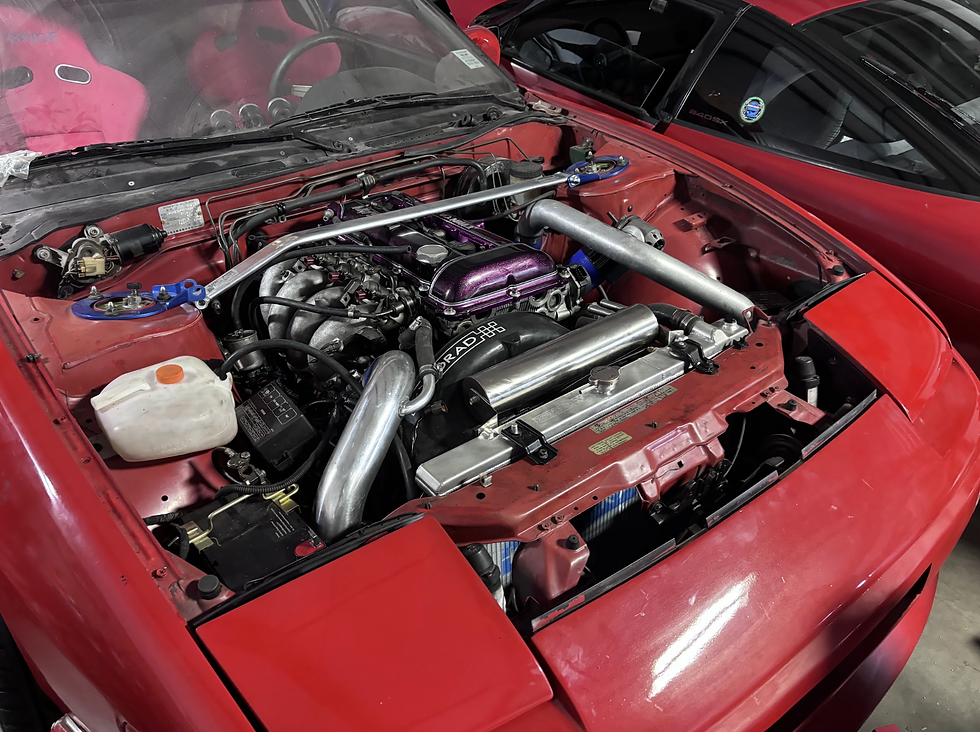
After quite a bit of troubleshooting the mystery tuned ecu & janky engine harness that came with my swap, I scored a deal on a new wiring specialties harness, untuned redtop sr20 ecu & an sr20 maf. I essentially put the engine back to stock electronically and introduced 370cc fuel injectors in to get the car to run properly. More issues led to the starter motor dying, swapping in a new starter motor and the car fired up! From there it was final assembly of the rear end, interior, engine bay, and bolt check to ensure the car was road worthy.













Mark post a Miata thread
Mans is following the formula to a T!
(this is in admiration not a diss)
All the right updates and done quickly! Looks great!
great attention to detail in all the right areas of this car. the fact that it has come together in under a year is really impressive, I've had my car for like three years now and it's more halfassed than this machine haha
love seeing the progress, cant wait to see sr in
I cannot wait to finally see that motor off the stand and in the car LETS GOOOO
good car man and very good progress